
The roots of my water-saving mindset go back to a childhood spent in a home without mains drainage, but the inspiration for my rainwater harvesting project came from Transition Southampton’s 2014 “Green Open Homes” event – and the realisation that 30% of the high quality drinking water that is piped into our home is simply flushed down the toilet. One of the open homes had a rainwater harvesting system self-designed and built by an engineer who kindly offered to help me create my own system. He and the plumber were the two key people without which it wouldn’t have happened. At root the project was simple. Collect rainwater in big tanks outside, periodically pump to a storage tank in the loft, and let it fall under gravity to the toilet.
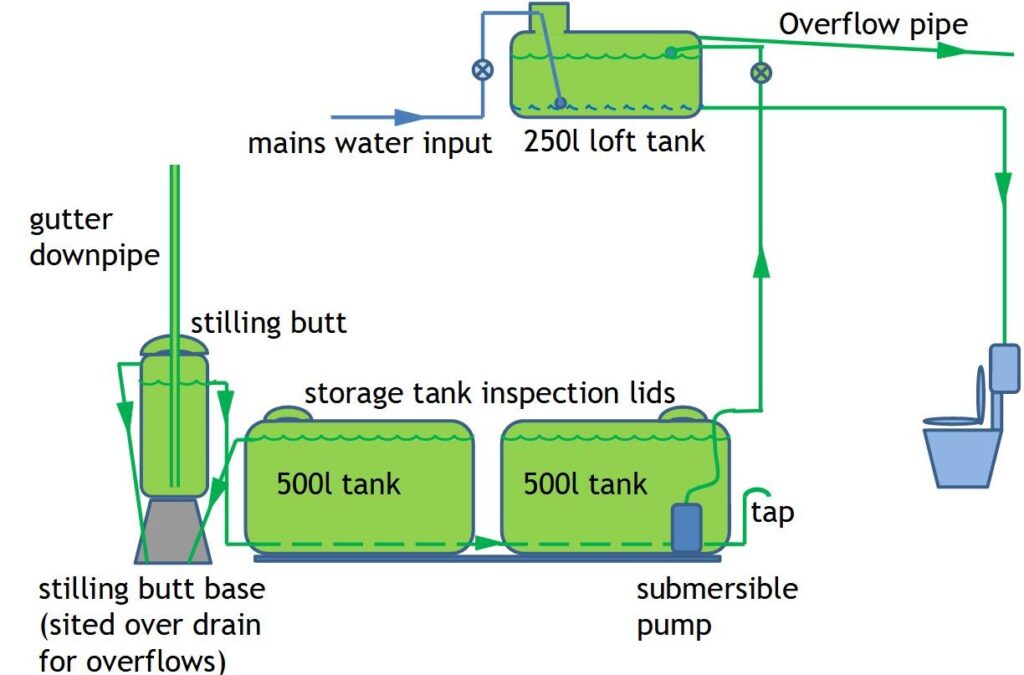
To avoid ‘gunk’ from the guttering the water goes to a “stilling tank” (an existing water butt), which feeds from the top into the main tanks. Space is limited and the tanks are highly visible so I opted for two 500 litre tanks, 1m high, 1m wide and 0.5m deep, in green rather than plain white or black. Each tank has a single threaded hole at ground level, so I connected these in parallel to the feed from the stilling butt, and also added a T-junction to a tap for garden watering and a drain at ground level so the tanks can be completely emptied if necessary. I used a submersible pump which just fits through the 20 cm diameter inspection lid. Its power lead and the water outflow pipe pass through holes cut in the top of the tank and then through the kitchen wall to the pantry, where the pump controller sits.

The water pipe goes up to the loft to a new 250 litre header tank. The outflow from this runs down through the bathroom ceiling to the cistern. With only one toilet, some sort of back up is essential. To comply with water regulations, mains water goes into the new loft tank via a “turret” resting above the tank so there is no possibility of rainwater ending up in the mains. Two ball valves complete the system, one for rainwater and one for mains. The rainwater valve shuts off when the tank is full, but the mains valve must stay closed until the water level drops to the point at which backup is required, about 7.5cm from the bottom of the tank. This means the arm has to be extended so the ball stays close to the bottom of the tank. The plumber, although intrigued by the whole project, found this psychologically difficult – normally a submerged ball means something is very wrong indeed! Extending the arm requires cutting it and inserting a section of brass cylinder. Getting the correct length is a matter of experiment and we spent a sweltering hour in the loft getting it right.
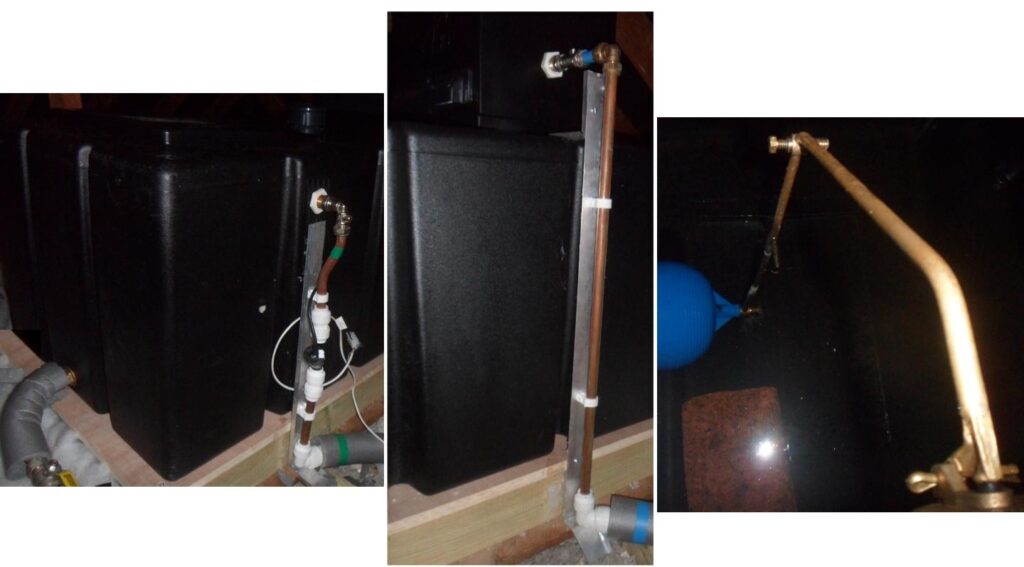
Middle: mains input to ‘turret’ above tank
Right: the extended ball valve arm (brick stops it jamming in the’open’ position)
So does it work? Yes! (After we’d swapped the toilet cistern valve for one capable of working with low flow.) The pump controller includes a timer and I generally use it in this mode, pumping twice a week. But it’s not quite “fit and forget”. The pump has a float switch to stop it pumping dry, but this cuts in when there is still enough water for a couple of loft tank refills, so in a drought I pump in manual mode while holding the float switch ‘open’ to make use of all available water. Is it worth it? Our water consumption fell by 30% but bills fell by less because of the standing charge. Cheap and cheerful methods of water saving (e.g. collecting shower water in a bucket for use in flushing) may be more cost effective, if everyone in the household cooperates. But we now flush with soft water, without paying for a water softener. The garden tanks are a talking point for visitors and make a useful “shelf” on which to place seedlings for hardening off. Finally, lockdown provided an opportunity for some “water butt art” to pretty them up with sticky paper and scrap timber.